Getting Started in SAURUS
First-hour checklist for the enclosure: spawn, tracker, early fuses, and safe habits before your first escape.
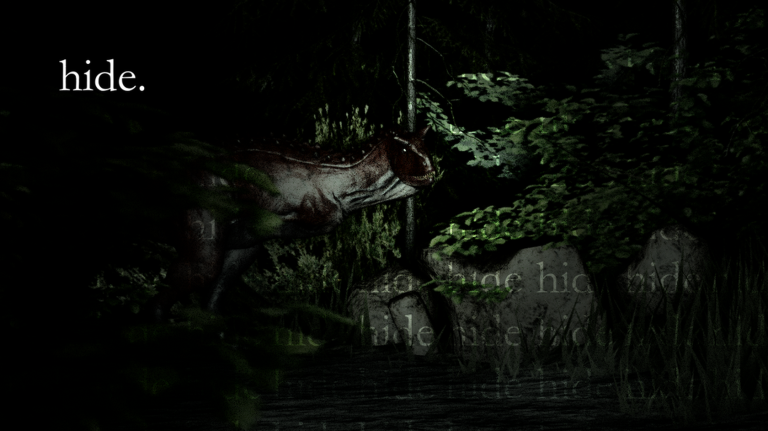
SAURUS [HORROR] drops you into a pitch-black forest reserve with almost no tutorial hand-holding. This getting started guide is the day-one checklist for Pegasi Games’ Roblox survival escape: how spawn works, what the objective tracker means, where the Center Building sits, and how to survive long enough to learn the six-fuse loop. Read this before you grind routes in Fuse Locations or chase a full clear in How to Escape.
What SAURUS is asking you to do
Your win condition is simple on paper. Collect six industrial fuses scattered across workstation tables, insert them into the yellow generator inside the Center Building, restore power to 100%, then sprint down the main dirt road through the open blast gate. Failures usually come from bear traps, loud footsteps near a hunting dinosaur, or getting lost on dark trails without a landmark plan.
You can play solo or with up to five players. Solo teaches the map cleanly. Co-op speeds fuse ferrying but raises noise and accidental aggro—skim the Players hub after your first successful solo attempt.
Spawn: scaffolding tower and Fuse #1
You awaken inside a metal scaffolding tower. The door opens onto enclosure grass. The objective tracker in the top-right typically shows FUSES FOUND: 0/6 and a prompt to find the Centre Building. Step through the open gate of the spawn cage. Directly ahead sits a white folding table with an open laptop and a black equipment case.
Press E (or your platform interact) on the Fuse prompt to grab Fuse #1. Securing a fuse early is both free progress and a confidence boost—many runs award completion points for a pickup inside the first few minutes. Do not sprint blindly into the trees yet. Orient yourself on the tall red beacon glowing above the tree line; that beacon marks the Center Building compound you will return to many times.
First destination: Center Building and Fuse #2
Follow the dirt road straight toward the red beacon. Walk up the ramp, pass the security door, and move through the main interior corridor into the rear machinery room. The large yellow generator stands against the wall. Fuse #2 sits on the folding table directly in front of that machine.
Interact with the generator panel. You will see a six-socket receiver and a fuse meter. Insert the two fuses you are carrying. The meter rises to roughly 33%, two segments turn green, and your tracker updates toward FUSES FOUND: 2/6. That early deposit is the most important beginner habit: bank progress whenever you are already inside the compound instead of wandering with a full hotbar while a dinosaur circles the yard.
Tools you always have
- Flashlight — Point it at the ground in open clearings so you can see spring-loaded bear traps in the grass. Sweeping the beam wildly into the canopy wastes attention and can make night navigation worse.
- Objective tracker — Trust the fuse count and the current instruction line. When it flips to escape-related text after 100% power, stop exploring and commit to the gate.
- Hotbar fuse stack — You can carry multiple fuses; the second hotbar slot often shows a stack counter. Still deposit early when the path home is safe.
Full binding details live on Controls, including mobile notes and Xbox issues some players hit when joining.
Survival basics before the outer trails
Leaving the generator room often alerts the hunting dinosaur. Your character may voice a line about being too loud when footsteps spike. Stand still in a doorway when heavy stomping passes outside. Dinosaurs cannot enter standard building interiors the way players can, so doorways and rooms are legitimate shelters—not cowardice.
Wait until the creature walks behind exterior fencing before you step into the open yard. Crouch along chainlink when the beast circles the Center Building later in the run. When you see muddy dung heaps on ridgelines, use the Mask scent prompt to temporarily hide your odor. Those scent mounds are covered in depth on Survive Dinosaurs and the dedicated Scent Mounds guide.
White utility jeeps parked at path intersections make excellent landmarks. Mentally tag jeep → beacon → generator so you can navigate home even when panic sets in.
What to do after the first deposit
With 33% power banked, exit through a side fence gate and begin the outer trail sweep. Look for faint white laptop glow—that light marks remaining fuse workstations. A practical beginner order is pine-brush table (Fuse #3), dead-tree clearing (Fuse #4), ridgeline desk (Fuse #5), return deposit to ~83%, then lower dirt road (Fuse #6) for the final insert to 100%. The numbered map lives on Fuse Locations.
Do not try to memorize every bush on run one. Instead memorize: spawn table → beacon road → generator deposit → laptop glow → scent mound → doorway wait. That checklist alone will carry most first escapes.
Common beginner mistakes
- Sprinting with the flashlight aimed at the sky — You miss traps and lose path contrast.
- Hoarding all six fuses before any deposit — One death wastes a huge stack; bank at 33% and again near 83%.
- Leaving the Center Building while a dinosaur stares at the doors — Wait for the turn, then move.
- Ignoring scent mounds — Free stealth on ridgelines; take it.
- Skipping controls practice — If interact or crouch feels sticky, fix that on Controls before blaming the map.
Suggested first-session plan
Spend your first session only on spawn → Fuse #1 → Center Building → Fuse #2 → 33% deposit → doorway wait practice. On session two, add one outer fuse and a safe return. On session three, attempt the full six-fuse escape using How to Escape. After a clean clear, try Challenge Mode with Challenge Mode and check Codes or Updates for any new modifiers Pegasi Games ships.
Related pages
- Fuse Locations — exact workstation route and percent checkpoints
- How to Escape — full walkthrough to the blast gate
- Survive Dinosaurs — T-Rex and Carnotaurus pressure tools
- Controls — PC, mobile, Xbox notes
- Scent Mounds — mask scent windows on ridgelines
- Bear Traps — flashlight-low trap discipline
- Enclosure Map — landmark chain from spawn to gate
- Solo Tips — solo pacing after your first loops
- Guides Hub — every walkthrough in one place
- Tier List — priorities after you can clear reliably
Master the first two fuses and doorway patience, and the rest of SAURUS becomes a routing puzzle instead of a jump scare loop.
Frequently Asked Questions
Quick answers for SAURUS survivors.
Where is the first fuse in SAURUS?
Outside the spawn scaffolding cage on a white folding table with a laptop and black case. Press interact to grab Fuse #1, then follow the red beacon to the Center Building.
How many players can join a SAURUS run?
Solo or groups of up to five. Learn the map solo first, then use the Players hub for co-op roles.
What does the yellow generator do?
It accepts all six fuses. At 100% power the perimeter blast gate unlocks so you can escape down the main dirt road.
Should I deposit fuses early?
Yes. Insert the first two for ~33% as soon as you reach the Center Building, then bank again near ~83% before the final fuse.